

Arkadaşlar client build etmeyi anlattım forumda ama elimizde olan source dosyaları
sadece visual studio 2008 de build edilebiliyorr. Gerekli olan lib ve include dosyalarını
sadece visual studio 2008 de tanıtabiliyoruz visual studioya. Şimdi vereceğim source visual studio 2013
de build edilebiliyor. Bu sourcede include ve lib klasörlerini vs ye eklemeye gerek yok. Direk projei açıp build edebilirsiniz... Build işleminin hızı %50 artıyor.
sadece visual studio 2008 de build edilebiliyorr. Gerekli olan lib ve include dosyalarını
sadece visual studio 2008 de tanıtabiliyoruz visual studioya. Şimdi vereceğim source visual studio 2013
de build edilebiliyor. Bu sourcede include ve lib klasörlerini vs ye eklemeye gerek yok. Direk projei açıp build edebilirsiniz... Build işleminin hızı %50 artıyor.
Ziyaretçiler için gizlenmiş link,görmek için üye olmalısınız!
Giriş yap veya üye ol.
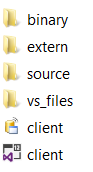
build işlemi bittiğinde exe miz binary klasörüne gelmektedir.
Gerekli source indirme linki:
Ziyaretçiler için gizlenmiş link,görmek için üye olmalısınız!
Giriş yap veya üye ol.
Virustotal:
Ziyaretçiler için gizlenmiş link,görmek için üye olmalısınız!
Giriş yap veya üye ol.
lib hatası alanlar için client libleri:
Ziyaretçiler için gizlenmiş link,görmek için üye olmalısınız!
Giriş yap veya üye ol.
yada python2.2 kurup libleri ordan alabilirsiniz daha güncel olur.
Sourcede olanlar:
ENABLE_COSTUME_SYSTEM
ENABLE_ENERGY_SYSTEM
ENABLE_DRAGON_SOUL_SYSTEM
ENABLE_BELT_SYSTEM
Cryptopp 5.6.2
boost 1.55


Kanıt:

2011 Metin Clientine derlerdiğim exe yi attığımda oluşan görüntü

Visual Studio 2013 ile Client Build Etme
Metin2 özel sunucu geliştirme sürecinde, client tarafında yapılan değişikliklerin derlenerek çalıştırılabilir hale getirilmesi oldukça önemlidir. Bu bağlamda Visual Studio 2013, özellikle eski C++ tabanlı client yapılarının derlenmesinde tercih edilen bir ortamdır. Bu yazıda, Visual Studio 2013 kullanarak Metin2 client build işlemini nasıl yapacağınızı adım adım anlatacağız.
Gereksinimler ve Hazırlık
Visual Studio 2013 kullanarak client build işlemi başlatılmadan önce gerekli ortamın hazırlanması gerekir. Öncelikle, client source kodlarına sahip olmanız gerekir. Bu kaynaklar genellikle Martysama veya diğer Metin2 geliştirici platformlarından temin edilebilir. Client src dosyaları, genellikle UI scripting, C++ sistemleri, paketleme süreçleri gibi bileşenleri içerir.
Ayrıca, doğru sürüm Visual Studio 2013 yüklü olmalıdır. Visual Studio 2013 Community veya Professional sürümleri kullanılabilir. Derleme sırasında STLPort kütüphanelerinin doğru konfigürasyonu da büyük rol oynar. Eğer STLPort eksikse veya yanlış tanımlanmışsa, build sırasında hatalarla karşılaşabilirsiniz.
Client Projesini Açma
Visual Studio 2013’ü açtıktan sonra, client source dosyalarının bulunduğu .sln (solution) dosyasını açmalısınız. Genellikle bu dosya 'Client.sln' olarak adlandırılır. Proje dosyası açıldığında, Solution Explorer penceresinde proje bileşenleri görünecektir. Burada, client executable dosyasını oluşturan ana proje genellikle 'Game' ya da 'Client' isimlerini taşır.
Projeyi açarken, bazı dependencies eksik olabilir. Özellikle Python GUI (PyGUI), UIScript veya Py Root klasörleri ile ilişkili yapılar eksikse, manuel olarak yol tanımlamaları yapılmalıdır. Bu yapılar, oyunun arayüz ve grafik sistemlerini kontrol eder.
Build Ayarlarını Yapılandırma
Proje açıldıktan sonra, build ayarları önemlidir. Genellikle client build işlemi Release modda yapılır. Bunu değiştirmek için, Visual Studio'nun sol üst köşesinde bulunan menüden 'Debug' yerine 'Release' seçilmelidir. Release mod, daha optimize edilmiş bir executable dosyası üretir ve performans açısından avantaj sağlar.
Ayrıca, platform toolset'in doğru seçilmesi gerekir. Visual Studio 2013 için varsayılan toolset genellikle v120'dir. Yanlış toolset seçilirse, derleme işlemi başarısız olabilir. Configuration Properties > General kısmından toolset seçeneğini kontrol edebilirsiniz.
Derleme İşlemi
Tüm ayarlar yapıldıktan sonra, projeyi build etmek için Solution Explorer üzerinde proje adına sağ tıklayıp 'Build' seçeneğini seçin. Alternatif olarak, menüden Build > Build Solution seçeneği de kullanılabilir. Build işlemi sırasında, console penceresinde hata veya uyarı mesajları görünebilir. Hatalar çözülene kadar build tamamlanamaz.
Hatalar genellikle missing dependency, yanlış include path, veya yanlış library referanslarından kaynaklanabilir. Bu durumda, örneğin DB Core, Game Core gibi sistemlerle ilgili kütüphaneler eksikse, bunların doğru yolları projeye eklenmelidir.
Client Build Sonrası İşlemler
Başarılı bir build işleminden sonra, proje dizini altında 'Release' klasörü oluşur ve bu klasör içinde '.exe' uzantılı client dosyası yer alır. Bu dosya doğrudan oyunu başlatmak için kullanılabilir. Ancak, client executable sadece tek başına çalışmaz; gerekli pack, resource ve config dosyaları ile birlikte aynı dizine konulmalıdır.
Paketleme işlemleri için genellikle Martysama Packager gibi araçlar kullanılır. Bu sayede client dosyaları güvenli ve sıkıştırılmış bir şekilde dağıtılabilir. Ayrıca, client src üzerinde yapılan değişikliklerin test edilmesi için local server ortamında compile edilmiş client çalıştırılmalıdır.
Sonuç
Visual Studio 2013 ile Metin2 client build etmek, server geliştiricileri için oldukça kritik bir adımdır. Doğru yapılandırma ve dikkatli hata yönetimi ile client build işlemi başarıyla tamamlanabilir. Client src düzenlemeleri, C++ sistemlerinde yapılan değişiklikler, PyGUI entegrasyonları gibi gelişmiş işlemler bu derleme süreciyle doğrudan ilişkilidir. Bu nedenle, client build süreci Metin2 development, Metin2Dev ve genel game core geliştirme süreçlerinde merkezi bir rol oynar.
Building Client with Visual Studio 2013
In the process of developing private Metin2 servers, compiling changes made on the client side into an executable form is very important. In this context, Visual Studio 2013 is a preferred environment, especially for compiling older C++ based client structures. In this article, we will explain step-by-step how to perform a Metin2 client build using Visual Studio 2013.
Requirements and Preparation
Before starting the client build process using Visual Studio 2013, the necessary environment must be prepared. First, you need to have the client source codes. These sources are usually obtained from platforms such as Martysama or other Metin2 developer resources. The client src files typically contain components like UI scripting, C++ systems, and packaging processes.
Additionally, the correct version of Visual Studio 2013 must be installed. Visual Studio 2013 Community or Professional editions can be used. During compilation, the correct configuration of STLPort libraries also plays a major role. If STLPort is missing or incorrectly defined, errors may occur during the build process.
Opening the Client Project
After opening Visual Studio 2013, you should open the .sln (solution) file located within your client source folder. Usually, this file is named 'Client.sln'. Once the project file is opened, its components will appear in the Solution Explorer window. Here, the main project responsible for creating the client executable usually carries names such as 'Game' or 'Client'.
While opening the project, some dependencies might be missing. If components related to Python GUI (PyGUI), UIScript, or Py Root folders are missing, manual path definitions may be required. These structures control the game's interface and graphics systems.
Configuring Build Settings
After opening the project, the build settings are crucial. Usually, the client build process is performed in Release mode. To change this, select 'Release' instead of 'Debug' from the dropdown menu in the top-left corner of Visual Studio. Release mode produces a more optimized executable file and offers performance advantages.
Also, the platform toolset must be correctly selected. For Visual Studio 2013, the default toolset is usually v120. If the wrong toolset is selected, the build process may fail. You can check the toolset option under Configuration Properties > General.
The Build Process
After all settings are completed, right-click on the project name in Solution Explorer and select 'Build', or use the Build > Build Solution option from the menu. During the build process, error or warning messages may appear in the console window. The build cannot complete until these errors are resolved.
Errors usually stem from missing dependencies, incorrect include paths, or incorrect library references. In such cases, if libraries related to systems like DB Core or Game Core are missing, their correct paths must be added to the project.
Post-Build Operations
After a successful build, a 'Release' folder is created under the project directory, containing the client executable file with a '.exe' extension. This file can directly start the game. However, the client executable does not work alone; necessary pack, resource, and config files must be placed in the same directory.
Packaging operations are generally done using tools like Martysama Packager. This way, client files can be distributed securely and compressed. Additionally, compiled clients must be run in a local server environment to test changes made on the client src.
Conclusion
Building a Metin2 client with Visual Studio 2013 is a critical step for server developers. With correct configuration and careful error management, the client build process can be completed successfully. Modifications on the client src, changes made in C++ systems, PyGUI integrations, and similar advanced operations are directly related to this build process. Therefore, the client build process plays a central role in Metin2 development, Metin2Dev, and overall game core development workflows.
